BIT-101
Bill Gates touched my MacBook Pro

In this article, I want to talk about using libraries to make creative coding faster, easier and more enjoyable.
For more years that I’d like to admit, I engaged in reinventing wheels. I’d re-write the same code over and over. If I wanted to find the distance between two points, instead of using a distance function, I’d just write (pseudocode):
dx = p0.x - p1.x
dy = p0.y - p1.y
dist = sqrt(dx * dx + dy * dy)
Another example: most drawing APIs supply you with an arc function that’s something like this:
arc(x, y, radius, startAngle, endAngle, counterclockwise)
So every time I wanted to draw a circle, I’d type it all out rather than creating a circle function:
arc(100, 100, 50, 0, PI * 2, false)
I could probably come up with dozens of other examples. If I wanted to draw a path through an array of points, I’d loop through the array and draw a line to each successive point, when I should have created a path function. I’d done all these things so many times that I didn’t even have to think about them, the code would just fall out of my fingertips. So one of the plus points of this approach was that I learned a lot of concepts really, really well.
And sometimes I wanted to do something slightly different - it was easy enough to change the code right there because it wasn’t hidden away in a function.
Or maybe in addition to needing to know the distance between two points, I’d also need to know the angle between them. In that case, I could re-use the intermediate dx and dy variables in the atan2 function, building it a bit of optimization. Calling a distance function and then an angle function would calculate these values twice internally.
Another plus point was that I never needed any dependencies. In a call back to a previous article, I could just open an editor and start typing, without needing to pull in a library or framework.
But as time went on and projects got more complex, I had to come with the grips with the fact that I was wasting a lot of time writing the same code over and over. And sometimes I’d figure out some complex idea, but it wasn’t something I’d use very often. Then later I’d need to do that thing again and I’d either have to figure it out again, or dig up the project where I’d done it before.
So I created a library that I called bitlib and started dumping all my functions in there. I started this in ActionScript and started it again, probably multiple times in JavaScript. I still wasn’t a total convert to this workflow though. I’d use the library sometimes, but not others. It was never very well organized and I kept recreating a new version rather than trying to improve an existing one. I think it was some time in 2016 that I got a bit more serious about curating this library - in JavaScript at the time. Purely for reference: https://github.com/bit101/bitlibjs - this is not something I use anymore.
In 2017 I consolidated this library even more while working on a new version of the BIT-101 Lab. In the source code for that project, you can see multiple versions of bitlib in the libs folder. As I did new experiments, I was adding new functions to the lib. This was good. Right direction.
As mentioned, in late 2017 I started exploring Rust. On January 1, 2018 I blogged about a port of bitlib to Rust - bitlib-rs. https://www.bit-101.com/2017/2018/01/introducing-bitlib-rs-for-rust-and-cairo/. This was designed to work with the Cairographics bindings I was using to generate images and animations in Rust. Most of this was a direct port of what I had in JavaScript at the time.
A short while later, when I switched over to Go, I ported it all to that language. There’s been a few iterations and reorganizations of the code, but it’s followed a very direct, highly curated lineage for the past six years and I’m very proud of it. And that’s what I want to spend the rest of this article talking about.
My library currently consists of two main code bases.
blcairo is the main graphics library. It creates an image surface and a drawing context and beyond the Cairographics drawing API, it has over 100 custom drawing functions added to the context. So to draw a circle, I don’t have to use Arc:
context.Arc(100, 100, 50, 0, math.Pi, false)
I can just say:
context.Circle(100, 100, 50)
Each drawing function also has stroke and fill versions, so rather than saying:
context.Circle(100, 100, 50)
context.Stroke()
I can just say:
context.StrokeCircle(100, 100, 50)
These were trivial to code, but have saved me countless hours - not only in typing the extra line, but in trying to figure out why nothing got drawn because I forgot to type the extra line.
In addition to the core drawing API and extensions, there’s a render package that has all kinds of stuff in it for creating projects that generate animations, sprite sheets, videos, animated gifs, montages, etc. from multiple images. I’ll take a deeper dive into that shortly.
The other key part of my core libraries is the Go version of bitlib. This consists of all kinds of utilities that do not directly have to do with rendering (at least via blcairo). To avoid circular dependencies, I make sure that blcairo can depend on bitlib, but not the other way around. The packages in bitlib have, over the years, grown to the following:
bitmap is an alternate rendering target. blcairo is great for drawing vector shapes such as lines, curves, rectangles and paths, etc. But sometimes I need to iterate through every pixel of an image and set its color. The Cairo context is not great for that. I’ve often just drawn a 1x1 rectangle for each pixel, but that seems like overkill. You can get the image data from the surface and do the math to set each element of that data to the specific red, green, blue and alpha values and then put the image data back into the surface and then save it. That also seems like overkill. So I wrote my own bitmap encoder which works on an array of RGB color values. It’s very lightweight and pretty fast. So for doing something like Mandelbrot or other fractals, it’s ideal.
blcolor is a color library that integrates wonderfully with blcairo. You can create RGB or RGBA color values with integers (0-255) for each channel, or floats (0.0-1.0) per channel, a single integer (0x000000-0xFFFFFF for RGB, but also an alpha version), HSV, HSL, CMYK, or grayscale. You can create random colors or interpolate between two colors to create another color. There are a dozen and a half methods to compare colors (equals, straight diff, perceptual diff), evaluate certain aspects of colors (luminance, contrast), convert from RGB to HSV, HSL, CMYK, grayscale) or alter colors (scale, quantize, add, rotate, invert). There are methods for almost 150 standard named colors (Turquoise, Alice Blue, Olive, etc.), and a package for creating, manipulating and using color palettes.
blmath contains a lot of useful math functions beyond what exists in the Go math module. A few dozen functions and constants, always growing. The ones I use the most are those that map a number within a certain range to another range, or clamp it to that range, wrap it around that range, map it exponentially, etc. There’s one that I use constantly that I’ll cover later.
easing is an implementation of Robert Penner’s easing formulas. This lets you say I want the value of this variable to move from x to y over a certain time period or number of frames. It might start out fast and ease into position at some rate, or ease out of its original position slowly, or do both. Or bounce or spring around a certain point, etc. These exact equations are used in many animation libraries. One thing I’d like to add is some sequencing, so I could set a chain of different motions into effect.
geom has all kinds of geometry based functions and types. Points, lines, segments, rectangles, triangles, paths, circles, etc. Ways to create these objects and manipulate them. There’s also some collision detection routines in there. It’s not fully fleshed out, but you can see if most of these types are colliding with the same type of some of the other types, and often get the point(s) of collision.
noise contains Perlin and Simplex noise functions - in one, two and three dimensions.
random is a PRNG (pseudo random number generator). This uses Go’s built-in rand module under the hood, but creates an much improved and more useful (IMO) API on top of it. You can get random floats or ints, or a float or an int within a certain range, or an array of floats or ints. You can get a random boolean or a weighted boolean. There are methods that use normal distributions or powers. You can also generate a random string of a given length with given types of characters. You can generate random numbers directly through the module, i.e. x = random.Float() which is fine most of the time, but if you’re running multiple routines (threads) they will share the same PRNG, which can mess you up. In that case you can create a random number generator for each routine and use that safely:
rng := random.NewRandom()
x = rng.Float()
Moving back to blcairo, I want to talk about the render package because I’m pretty proud of some of the stuff in there. None of the stuff in this package is required to use to create images or animations, but it makes things far easier. Without this package, it’s still pretty easy to create a still image. It looks something like this:
func main() {
	surface := cairo.NewSurface(400, 400)
	context := cairo.NewContext(surface)
	context.ClearRGB(0, 1, 0)     // green
	context.SetSourceRGB(1, 0, 0) // red
	context.FillRectangle(100, 100, 200, 200)
	surface.WriteToPNG("out.png")
}
When you run that, it creates the following image:
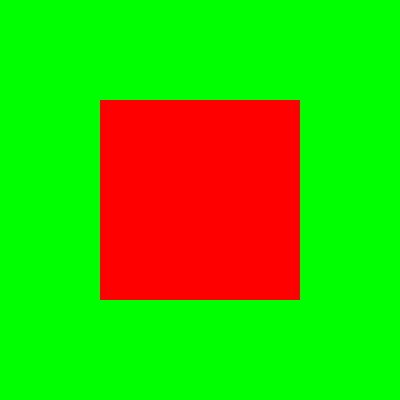
Using the render package, you can change that to:
func main() {
	render.Image(400, 400, "out.png", renderFrame, 0)
	render.ViewImage("out.png")
}

func renderFrame(context *cairo.Context, width, height, percent float64) {
	context.ClearRGB(0, 1, 0)     // green
	context.SetSourceRGB(1, 0, 0) // red
	context.FillRectangle(100, 100, 200, 200)
}
Here, you can just call the render.Image function, passing in the size of the image, a name for the output, a function that has the actual rendering code and a percent value. Forget about that last param for a moment. Now the surface and context are created for you and your renderFrame function is called with the needed params. You do the drawing and that’s it. There’s even a function that calls an installed image viewr to view the final image immediately.
Now that might not seem like all that much of an improvement. Same number of lines of code, and we’ve added an extra function. But it becomes pretty freaking awesome when you move into animation.
Say you want to do a two-second animation at 30 frames per second. You have to render 60 separate images to disk (or maybe memory). And you have to figure out how to change each image on each frame to create the animation that you want. Then you have to take all of those generated frames and assemble them into an animated gif or a video or a spritesheet or whatever.
That can be dozens of lines of complicated code: math, file io, calling external tools.
Look how simple this becomes:
func main() {
	render.Frames(400, 400, 60, "./frames", renderFrame)
	render.ConvertToVideo("./frames", "out.mp4", 400, 400, 30, 2)
	render.PlayVideo("out.mp4")
}

func renderFrame(context *cairo.Context, width, height, percent float64) {
	context.ClearRGB(0, 1, 0)     // green
	context.SetSourceRGB(1, 0, 0) // red
	context.FillRectangle(100, 100, 200*percent, 200*percent)
}
Run this, and within a second, you see this video playing:
First we call render.Frames which takes a width and height, the total number of frames to render (2 seconds times 30 fps), a directory to store the frame images and a function to call to render each frame. The frames will be created as files named frame_0000.png through frame_0059.png in this case.
Then we call render.ConvertToVideo. This takes the frames directory, the output file name, the size, fps and total time of the video in seconds. Yes, there’s some redundancy here, but hold that thought.
Finally, there’s a function that you can configure to play the video with your video player of choice.
Note that the signature of the renderFrame function has not changed. So we could continue to use this with render.Image. In practice, I often switch back and forth between the two, as I’ll mention later.
Anyway, renderFrame now makes use of the final percent parameter. Each of the 60 times that renderFrame is called, percent will be slightly bigger, going from 0.0 the first time it’s called (first frame) up to just under 1.0 for the final frame. Here, I’m using the percent value to change the size of the square I’m drawing. Pretty cool.
But there’s a problem with this animation. It does not cleanly loop. The square expands and then jumps back to its original size. I like my animations to loop perfectly. So we go back to the blmath package and one of my favorite functions, blmath.LerpSin. This is a combination of “lerp” for “linear interpolation” and Sin as in a Sine function. It’s a bad name because it’s not linear at all, but I’m sticking with it. What it does is map the 0.0 to 1.0 of percent to a new range of values that will loop from a minimum to a maximum using a sine wave. So you’d do something like this:
func renderFrame(context *cairo.Context, width, height, percent float64) {
	context.ClearRGB(0, 1, 0)     // green
	context.SetSourceRGB(1, 0, 0) // red
	size := blmath.LerpSin(percent, 0, 200)
	context.FillRectangle(100, 100, size, size)
}
Here, we’re mapping percent onto values going from 0 to 200. We save this in a size variable and use that to draw the square.
Less than a dozen lines of code and we have a perfectly looping animation.
As mentioned, there’s still some excess wordiness and duplication of parameters in there. A more recent update solves a lot of this as well. We can refactor the main function into:
func main() {
	program := render.NewProgram(400, 400, 30)
	program.AddSceneWithSeconds(scene1, 2)
	program.RenderVideo("./frames", "out.mp4")
	render.PlayVideo("out.mp4")
}
This introduces the concept of a “program” which contains a number of “scenes”. We create a new program with a size and fps.
Then we add a single scene, giving it a render method (which I renamed to scene1) and a number of seconds. We could also use program.AddSceneWithFrames to specify the length of the scene in frames rather than seconds.
Finally we just tell the program to render a video, giving it a place to save the frames and a name for the output file. Much simpler.
And now, as you can probably guess, we can easily build up complex animations using multiple scenes. Here’s an example, with fewer than 20 lines of code for a two-scene animation.
func main() {
	program := render.NewProgram(400, 400, 30)
	program.AddSceneWithSeconds(scene1, 2)
	program.AddSceneWithSeconds(scene2, 2)
	program.RenderVideo("./frames", "out.mp4")
	render.PlayVideo("out.mp4")
}

func scene1(context *cairo.Context, width, height, percent float64) {
	context.ClearRGB(0, 1, 0)     // green
	context.SetSourceRGB(1, 0, 0) // red
	size := blmath.LerpSin(percent, 0, 200)
	context.FillRectangle(100, 100, size, size)
}

func scene2(context *cairo.Context, width, height, percent float64) {
	context.ClearRGB(0, 1, 0)     // green
	context.SetSourceRGB(0, 0, 1) // red
	size := blmath.LerpSin(percent, 0, 100)
	context.FillCircle(200, 200, size)
}
A lot of the stuff I’ve talked about in the last few posts is now coming together. I’ve shown you the language and platform I’m using and the libraries and frameworks I’ve created. You’ve seen the enhanced Cairo drawing routines, the blmath stuff, and the power of the render package. Now let’s bring it full circle and show you the template that I use to start a new project:
package main

import (
	"github.com/bit101/bitlib/blmath"
	cairo "github.com/bit101/blcairo"
	"github.com/bit101/blcairo/render"
	"github.com/bit101/blcairo/target"
)

func main() {
	renderTarget := target.Gif

	switch renderTarget {
	case target.Image:
		render.Image(800, 800, "out/out.png", scene1, 0.0)
		render.ViewImage("out/out.png")
		break

	case target.Video:
		program := render.NewProgram(400, 400, 30)
		program.AddSceneWithFrames(scene1, 60)

		program.RenderVideo("out/frames", "out/out.mp4")
		render.PlayVideo("out/out.mp4")
		break
	}
}

func scene1(context *cairo.Context, width, height, percent float64) {
	context.BlackOnWhite()
	context.Save()
	context.TranslateCenter()
	context.DrawAxes(0.25)
	r := blmath.LerpSin(percent, 50, width/2)
	sphere := cairo.NewSphere(0, 0, r, 1, 0, 0)
	sphere.SetShadowColor(0.2, 0, 0)
	sphere.Draw(context)
	context.Restore()
}
It seems like a lot, but it’s mainly stuff we’ve already seen. At the start of main I just create a renderTarget variable. It starts out with the value target.Video. But it could also be target.Image, or target.Gif, target.SpriteSheet, target.Montage. Then it will call one of the blocks there, which either renders an image or video. If you want to render one of the other targets you can add a block for that. I can easily change that render target to change what it renders without changing any other code.
Sometimes I’m working on a video piece which takes several seconds to render a whole bunch of frames. But I’m just trying to get a basic form looking right. So I’ll switch over to rendering it as an image, which is much faster and allows me to iterate a lot quicker. Then when I have it down, I jump back to rendering the video.
The scene1 function just draws an animated red sphere - I showed that in a previous post. Usually when I create a new project using my tinpig tool, I’ll make the animation just to ensure it’s working correctly. Then I’ll clear out most of the scene1 code and start doing what I want.
One other bit of bling in the render package is when you go to render a video it gives you nice feedback about what’s going on. During render, you get a progress bar and an estimated time of completion:
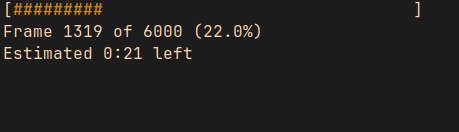
(I upped the number of frames to 6000 to give myself time to do the screenshot!)
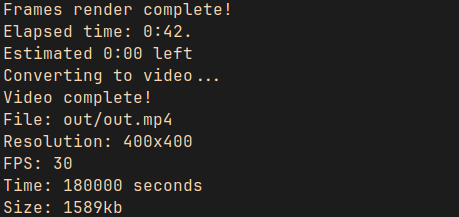
And when it’s done, it gives you a bunch of information about what it did.
It might sound like I’m giving you a sales pitch here. I’m honestly not. I don’t know if a single other person in the world is using these libraries. And that’s 100% fine with me. I made them for me and I love using them. In fact, if a lot of people used these, I’d have to be more worried about maintenance, avoiding breaking changes, dealing with feature requests, etc. So I’m happy being the main (or only) user.
My point is more that you should iterate on your own workflow until it makes you as happy as my workflow makes me.
It might also sound like I’m bragging a bit here. And sure, I definitely am. I’m pretty proud of what I’ve created here. It’s the culmination of many years of tiny improvements though. And culmination isn’t the best word either because I’m 100% sure that a year from now it will be even better.
Header Image 'Old books in Sarah's house' by lungstruck is licensed under CC BY 2.0