As mentioned, I created and submitted my first Windows 8 application to the Windows Store this past weekend. Overall, the whole process was very enjoyable. Some points about the process and the app itself:
First of all, you’ll need Windows 8 installed. If you’re reading this before October 26, 2012, then there are two prerelease versions of Win8 you can install. There’s the Consumer Preview, which you DON’T want, and the Enterprise Evaluation, which you DO want. The Enterprise Eval version is the only one that will allow you to install the Visual Studio tools you’ll need to make an app. You can find that version here: http://msdn.microsoft.com/en-us/evalcenter/jj554510.aspx. Again, if you’re reading this after October 26, you’ll probably just have to install the release version.
Then you’ll want a version of Visual Studio. Two choices here, and both will work. First, you can get the trial version of Visual Studio 2012 Professional. The trial license will last you a full 90 days, so you can definitely get a feel for the program and decide whether or not it’s worth the $499 price tag based on your actual needs. The other option is to install Visual Studio 2012 Express for Windows 8. This is a pared down version of VS that will only create Windows 8 apps. But it’s free and it is very likely all you will ever need if that’s all you plan to do. I’d suggest starting with Express if you’re just trying things out.
Once you have VS installed, you can have a look around and make a sample project, but you may be a bit overwhelmed. I highly recommend you follow these three tutorials: http://msdn.microsoft.com/en-us/library/windows/apps/br211385.aspx. At the very least, do the first two, which will get you up and running like a pro. The third one has you building an RSS reader which gets a bit more into the networking and parsing stuff than the app building stuff. But probably worth going through.
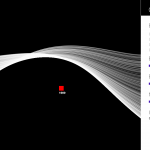
So, onto my app, “Particle Art”. As I said, the first thing I wanted to do was save a canvas as a bitmap. So I needed to draw some save-worthy content to that canvas. I started throwing down a bit of code here and there and realized I was making a particle system with attractors, basically like what I did for Scientific American a while back. So I followed that path and came up with something quite similar. Basically, a number of particles (up to 1000) enter from one of the edges of the screen and move towards the middle. You set up “attractors” that either pull the particles toward them with gravity, or repel them with… anti-gravity I guess. The attractors are drag-and-drop and you can adjust the force – positive or negative – on each one with a slider. Screenshot time!
I’ll get more into the technology of how apps work later, but I want to jump ahead to the device deployment and app submission processes, because these were both very exciting to me, having deployed and submitted apps on other platforms in the past.
I have on loan a Samsung Slate device running Windows 8, which is very cool. Naturally, I wanted to test the app on it. Here are the steps it took to do this:
1. Install the Remote Tools for Visual Studio 2012 on the device from this page. This takes just a couple of minutes to download and install. As part of this, it will ask you to register the device with MS, which is just a web page it takes you to. You sign in and click through. All told, this will take you about 5 minutes and only has to be done a single time for that device.
2. Make sure your dev computer and the device are on the same network.
3. In your app configuration, enter the name of the device that you want to deploy to.
4. In the Debug dropdown, instead of “Local Machine” choose “Remote Machine” and hit F5.
The app compiles and launches on the device! Note, there was nothing about device ids, app ids, developer certificates, mobile provisions, etc. Again, step 1 is the “hardest” one, only because it takes more then 2 mouse clicks. And again, you do this only once. When I started my second app, all I had to do was enter the name of the device in my app and choose remote and I was running the brand new app on the device.
Next up, when you’re done with your app, you’ll want to submit it to the Windows 8 store. For this, you’ll need a developer account, which will set you back all of $50 for a year. Then you begin the submission process. There are quite a few steps here, as outlined in this document: http://msdn.microsoft.com/en-us/library/windows/apps/jj657972.aspx but I found the UX on the whole process to be amazingly well done. It’s like what they used to call “wizards” which walk you through each step of a process. Click on step one, it tells you want to do and gives you the tools to do it. Click done, and you are taken to the next step. And you can see both your progress and your future steps all the way through. Despite it being my first time ever using the system, I walked through it quite easily. I think there was one brief point where I was a bit confused on where I needed to perform a step – some steps need to be done on the site, and some need to be done in Visual Studio – generally it’s very clear though.
Then, once you’ve submitted your app, you sit back and wait for its approval, right? Well, even here, the UX is amazing. Here’s what you see when you check in on your app:

This makes me happy. 🙂
I’ll post again when/if the app is approved. I think there may have been a UI issue I didn’t handle. Not sure if that will result in a rejection or not. If so, I know how to fix it, and I plan to anyway even if it does get approved.
Onward!








Sweet.
thank you for a nice writeup.
KRK
Hey keith, Thanks for sharing the whole process. Hope your app gets approved. Will be waiting for your next blog after approval.
Good Luck 🙂
hello hi, i am working on the same type of code for my architectural research . so can u help me out .. can u send me the code for this ..so that we can learn from it .. and might be helpful to develop our code..
thanks !!!