BIT-101
Bill Gates touched my MacBook Pro

I’ve been creating a bunch of image processing functions for my blcairo graphics library. It’s been a lot of fun and most of them have been surprisingly easy. So I thought I’d write about some of them. This all started when I when I wanted to try some dithering algorithms. Before applying the dithering, I wanted to convert the images to greyscale, so I put together a function for that.
This has always bothered me. In the back of my mind, I always thought there was some rule about the spelling of this word. And I was the only one who didn’t know the rule. It turns out that either one is correct. If you’re British, you’ll probably write about the colour grey. If you’re in the US, it’s the color gray. In my codebase, I use both versions all over the place. So in this article, I’ll give a shout out to my UK friends doing maths on the lifts on the way to the loo before heading back to their flats. Grey it is.
Actually, per usage stats I’ve seen, it seems that grayscale wins handily over gray-scale, gray scale, greyscale, grey-scale, or grey scale. But I’m sticking to my greyscale guns.
Here, we’re going to loop through every pixel in an image and convert it to a shade of grey based on the three RGB color channels.
I’m going to assume that you can get an array of bytes that represents your image. HTML’s canvas can do this, as well as anything based on Cairographics. This array will contain whole numbers in the range of 0-255. There will probably be four elements for each pixel - red, green, blue and alpha. They might be arranged that way - RGBA. That’s how HTML’s canvas works. But they might be in BGRA order which is how Cairographics works. Another system might do something else like ARGB. You’ll have to do the research for your platform. In this case, all we really need to know is which one represents the alpha channel because we’re not going to mess with that one, only the red, green and blue channels. We want to average them out somehow and set all of them to be equal. So say we have an array of bytes called data, we can loop through the values like so:
for (i := 0; i < data.length; i += 4) {
    // data[i] is one color channel. Probably red or blue.
    // data[i+1] is one color channel. Probably green.
    // data[i+2] is one color channel. Probably blue or red.
    // data[i+3] is probably the alpha channel
}
Let’s assume the last one is alpha, so we just need to deal with the first three. We want to set them all to the same value. There are a few strategies here. We could just choose one channel and set the others to be equal to it, like so:
for (i := 0; i < data.length; i += 4) {
    data[i+1] = data[i]
    data[i+2] = data[i]
}
// you'll now have to put the updated data array back into the image to have it reflect the changes.
Assuming the first channel is red, this sets the green and blue channels to that value. This will work, but you’ll get very different results for different images. An image with a lot of reds in it will appear very light, like so:
Source:

Red channel copied to green and blue:

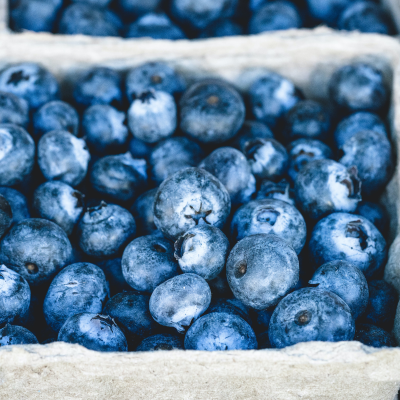
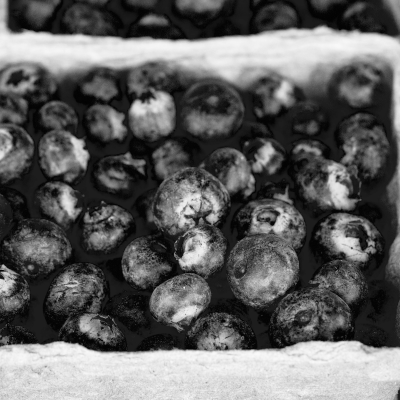
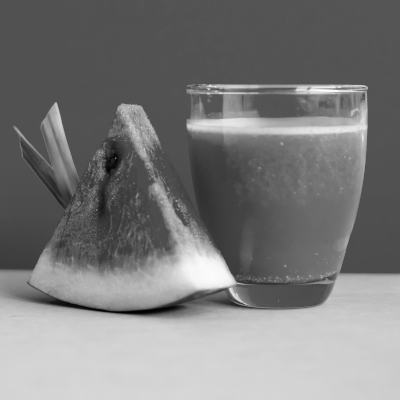
However an image with less red will wind up very dark.
Source:
Red channel copied to green and blue:
Another option would just be to average the three channels. Add them up and divide by three.
for (i := 0; i < data.length; i += 4) {
    grey = (data[i] + data[i+1] + data[i+2]) / 3
    data[i] = grey
    data[i+1] = grey
    data[i+2] = grey
}
The above code is very simplified. If your data array really is made of the data type byte, adding three bytes together will overflow the 256-value limit and give you some strange results. In that case, you’ll need to convert to a larger data type such as int or float, do the math, then convert back to byte. Or, separately divide each one by three and then add the results together.
This gives us:
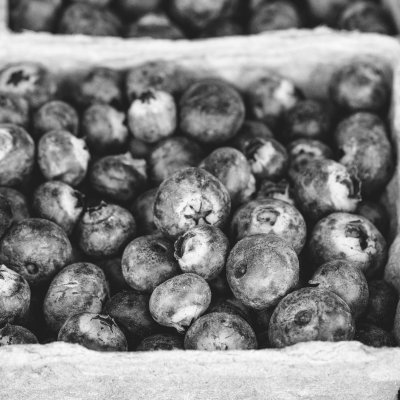
This is better, but kind of muddy. It has to do with the way the human eye (and brain) perceives different color frequencies. We see green as being much brighter than blue, with red somewhere in between. So just averaging the three channels doesn’t give us the results we want. We have to take those human perception biases and account for them somehow. Luckily, a lot of research has been done on this and we have values for each channel that represent our way of seeing things. Of course, this isn’t an exact science since everyone’s eyes and brains are slightly different, but here are some numbers that are pretty well accepted and give decent results:
Add these together and you’ll get a decent greyscale value. You might find other values listed in other articles. Feel free to try them out and use whatever you think looks best. Here’s some pseudocode for this:
for (i := 0; i < data.length; i += 4) {
    grey = data[i] * 0.299 + data[i+1] * 0.587 + data[i+2] * 0.113
    data[i] = grey
    data[i+1] = grey
    data[i+2] = grey
}
This assumes your bytes are in RGBA order. Also, this is again simplified in regards to data types. You’ll probably need to do some conversion to multiply the bytes by floats and then convert back to reset the data elements. I know you can figure that out.
Now we get:

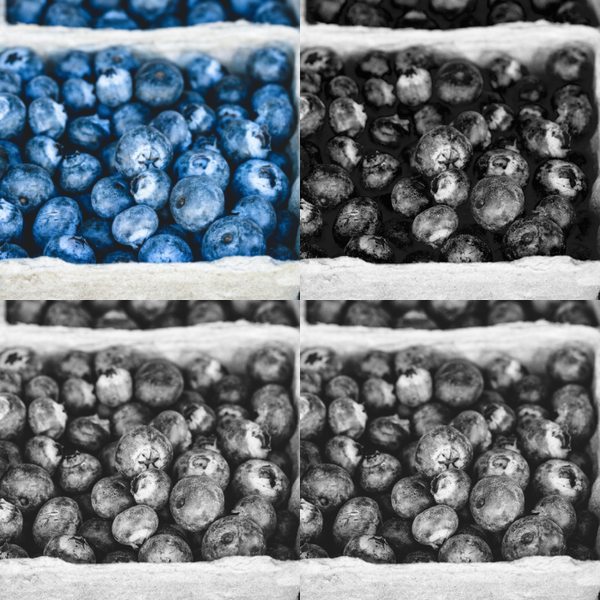
Here’s a montage of each of the results to get a better view:
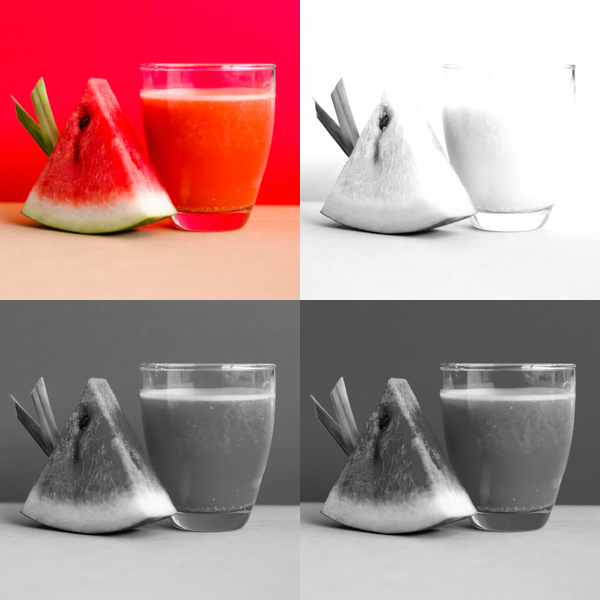
You might not see a whole lot of difference in the final two images. In fact, you might even like the straight average better than the perceptual average. But bear in mind, both of these images are very biased towards a single color. Let’s try an image with more varied color.
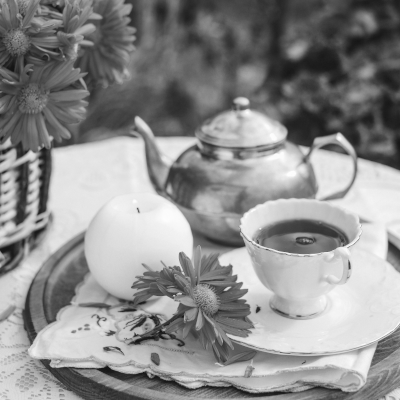
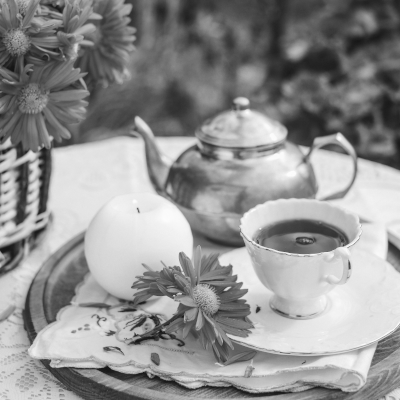
I won’t tell you what to think, but for me, the last image - perceptual greyscale - has more contrast and better details and reflects the feel of the original better.
Actually, here’s a video of the two images toggling back and forth. The slightly brighter one is the perceptual average version.
Now you can clearly see that the center of the flowers “pop” a lot more, and the green background is lighter with more contrast.
Of course, simple greyscale conversion is only the beginning. Later we’ll look at doing gamma correction, adjusting brightness and changing contrast, which can all have an effect on how the final greyscale image looks.