ANSI Escape Codes
Yesterday I created a little Go library to manage ANSI escape codes in Go.
I’ve been working on a command line app that will have a user selecting items from a list and asking a few questions in order to configure how the app runs. I realized that a bit of color would add a ton of context and make the experience much easier to navigate.
It turns out that there are quite a few libraries that do this kind of thing. Initially I used https://github.com/fatih/color which is pretty nice. But as always there were one or two things that didn’t work exactly the way I wanted them to. I started looking into how colors are defined in shells and just kind of wound up going down a rabbit hole on the subject.
I started just making a few functions that did the few things I wanted to do. These actually were sufficient to replace all of what I was doing with the library. But I kept working on it and kept seeing ways to improve it. And I was learning a lot and having fun. I started in the morning and banged on it off and on all day
Basics
ANSI escape codes can do all kinds of things in the terminal. You’re already familiar with a few, like \n for a new line, and \t for a tab character, and maybe \r for a carriage return (moves to the beginning of the current line without adding a new line).
Most people take a deep dive into escape codes when, like me, they want to set colors in the terminal. I’ve messed with this before when setting up my custom prompt a few times. But “promptly” forget about how it works each time. (Come on, that was good!)
But they are also useful for setting properties like bold, underline, reversed, moving to different locations in the terminal, clearing existing text from a line or the whole screen.
Most of these settings start by printing the escape code character to the terminal. That escape code is 27 in decimal, but you need to format it as an escape character. This can be done in a few different ways.
The most common way is octal:
\033
But some people prefer hex:
\x1b
If you’re really into unicode, you can even go with:
\u001b
I prefer \033 so that’s what I’ve used throughout.
After the escape code, you need to print an opening square bracket for most of the commands we’ll be using. This is the Control Sequence Introducer or CSI.
\033[
Now you’re set up to enter a code that actually does something.
Colors
Basic colors are defined by a number between 30 and 37, followed by the letter “m”.
Some references will tell you that you need two numbers, separated by a semicolon, and followed by the letter “m”. The first number can be 0 or 1 and specifies the brightness/boldness of the color. The second number is a number from 30 to 37 inclusive. This gives you eight base colors with two shades for a total of 16.
This is actually pretty inaccurate and I’ll cover the truth below, but for now let’s just look at the eight base colors.
To set a regular red color, you’d do this:
\033[31m
Try it in a terminal like so:
echo "\033[31mHello, world, I am red."

If this doesn’t work for you, you might have to pass -e to the echo command to enable it to interpret the backslash escape character.
echo -e "\033[31mHello, world, I am red."
These colors may look slightly different depending on your OS, terminal emulator and colorscheme in use.
Here are the color codes;
30: Black
31: Red
32: Green
33: Yellow
34: Blue
35: Magenta
36: Cyan
37: White
The Shocking Truth about that Leading 0/1
First, let’s learn about another ANSI code – bold. The code for bold is just 1. And if you want to turn it off, or explicitly say not bold, use 22.
echo "\033[1mThis is bold!"
You can even insert the sequence in the middle of a string and turn it off again later.
echo "The word \033[1mbold\033[22m is in bold"
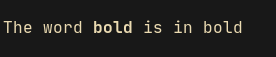
It’s subtle there, but yeah.
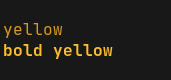
We can combine multiple sequences into one. Just set the color code, a semicolon, and the bold code, all followed by the “m”. For example, we can add a color and the bold attribute. Let’s compare “regular yellow” with “yellow plus bold”.
echo "\033[33myellow"
echo "\033[33;1mbold yellow"
So as I said, some references tell you you need the 0 or 1, followed by the color code to fully define a color. Like this:
Black        0;30     Dark Gray     1;30
Red          0;31     Light Red     1;31
Green        0;32     Light Green   1;32
Brown/Orange 0;33     Yellow        1;33
Blue         0;34     Light Blue    1;34
Purple       0;35     Light Purple  1;35
Cyan         0;36     Light Cyan    1;36
Light Gray   0;37     White         1;37
This is wrong and misleading. There are eight basic colors and 1 is the code to print in bold. Period. Yes, unbolded yellow can be pretty dim and look more orange or brown, but these are non-standard, random names that just confuse things.
So what about 0? Well it’s not the “not bold” code. In fact, we already saw that 22 is the code to undo bold.
In fact, 0 is the reset code. It resets all styles. So it’s actually pretty good to have it in there as a first code, especially when you are trying to create a new style when other styles might already be in play.
But thinking that the first code should be “0 or 1” is very misleading and can lead to confusion. Here’s a use case:
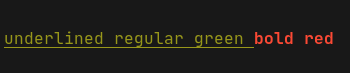
Say I wanted some text in regular green, underlined and then the more text in bold red – not underlined. If I’m fixated on “0 or 1”, then I’ll do something like this (4 is the code for underline):
echo "\033[0;32;4munderlined regular green \033[1;31mbold red"

But now the red is still underlined. If I change the last 1 to a 0, then I’ll get rid of the underline, but I’ll lose the bold. I actually need both! And there’s no problem with doing that.
echo "\033[0;32;4munderlined regular green \033[0;1;31mbold red"
In fact, you could move the 1 later, like this:
echo "\033[0;32;4munderlined regular green \033[0;31;1mbold red"
The first version is saying “clear it, then make it bold and red” and the second one is saying “clear it, then make it red and bold”. Same thing.
Thinking that colors are a two-part code with a leading 0 or 1 is just incorrect. Saying you have to prefix a 0 or 1 is literally saying, “reset all styles OR add a bold style to whatever style is there already.” Illogical.
It took me a long time to work through the logic of all this, but now it makes a lot more sense. Hopefully this helps you down the line.
Actual Bright Colors
There’s one more color / shading alternative, which is another set of actual “bright” colors from 90 to 97. These are brighter than the regular colors, but don’t give you quite the brightness as the bold versions.
Below you can see 36m, 96m, 1;36m and 1;96m.

A subtle difference, but good to know. (Actually I don’t see any difference in the last two, but maybe you do.)
Background Colors
You can also use ANSI escapes to set background colors. these again follow the same sequence but go from 40 to 47.
echo "\033[41mRed background"

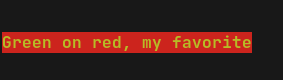
Now you can combine a background and foreground color:
echo "\033[0;1;32;41mGreen on red, my favorite"
There are other codes for making text more dim, or italic or strikethrough, but these have much less support in terminal emulators than the ones I’ve mentioned.
And if you have a supported terminal, you can specify up to 256 colors with a bit different syntax that I’m not going to cover here because it’s just beyond what I need.
There’s a whole lot of other stuff you can do with these codes, including moving the cursor up or down or left or right or to a specific row and column, and clearing part or all of a line or part or all of the terminal window.
This page is one of the better one-stop references I’ve found:
https://gist.github.com/fnky/458719343aabd01cfb17a3a4f7296797
The library!
So anyway, back to that library I created… 🙂
It just incorporates all of this into a Go module giving you functions you can call rather than trying to remember all those codes.
It’s here: https://github.com/bit101/go-ansi
Described pretty well there, but basically you can do things like:
ansi.SetFg(ansi.Red)
ansi.SetBg(ansi.Black)
ansi.SetBold(true)
ansi.SetUnderline(false)
ansi.SetReversed(false)
fmt.Println(“Hello, world!”)
And this will print in bold red on a black background. One of the cool things about using these sequences in code is that they are “sticky”, i.e. once you set some of these properties, they apply to anything else you print to the console until you change or reset them. This is unlike using echo in the terminal itself, where each escape is one-shot.
In addition to these sticky property settings, I also created a few print helper functions that mirror the built in Go print functions: ansi.Print, ansi.Printf, and ansi.Println. These just add an ANSI color constant as a first argument.
ansi.Println(ansi.Red, "this will be red)"
Like echo, these are one-shot functions, which is useful when you want to print one message in a color and not have to worry about resetting things back to default.
It also has functions for several of those cursor movement and screen clearing codes.
As I said there are plenty of other libs out there that do similar things, but I built this to work just the way I want it to. So I’m keeping it!
Comments? Best way to shout at me is on Mastodon ![]()